Christmas Crafts – Coathanger Tree
6 coat hangers join together to form this beautiful Christmas tree. Ideal for adding a touch of Christmas to your room or giving as a gift to a loved one.
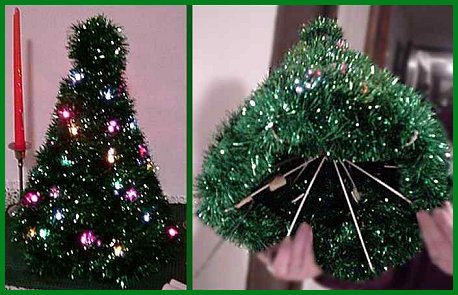
SUPPLIES:
- 6 wire coathangers
- Lots of twist ties or string
- 1 string of Christmas lights (35-50 bulbs)
- 2 to 4 garlands (the thicker they are, the fewer you’ll use)
- Small ornaments
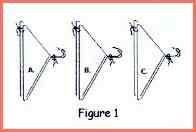 Step 1Group the hangers into three pairs. Secure one corner of each pair with a twist tie or piece of string. See Figure 1.
Step 2
Working in your lap, take hanger pair A. and place them on your left thigh with the hooks pointing toward your right leg and the tied corner toward your knee. Take hanger pair B. and place them on your right thigh with the hooks pointing toward your left leg and the tied corner toward your knee. See Figure 2. 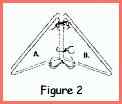 Using existing twist ties/string, tie the corners toward your knees together. Arrange the hooks neck to neck and so both sets of hooks are on top of the wires. Take a new twist tie/string and secure the two hanger pairs together just above the hooks as shown in Figure 2.
Step 3
Pick up hanger pair C. and, holding them with the hooks pointing toward the floor, place the tied corner with the tied corners of hanger pairs A. and B. Make sure the hooks on hanger pair C. pass below the other two 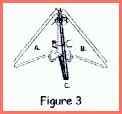 sets of hooks and stick out on the floor side of the hangers. See Figure 3. Using the existing twist ties/string, tie the three corners together. Again using the existing twist tie/string in the center down by the hooks, secure hanger pair C. to the other two. At this point you should have three “legs” – one on your left thigh, one on your right thigh and one up the middle of your torso.
Step 4
Spread the hanger pairs out until they look like a tripod and place them 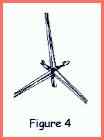 on the floor in front of your feet. (Or on a table in front of you.) See Figure 4 for an overhead view. Pick up a twist tie/string and, starting with the pair of hooks facing you, spread them apart. Using the twist tie/string, secure the hook on your left to the wire of the hanger to the left of the hook. Pick up another twist tie/string and secure the hook on your right to the wire of the hanger to the right of the hook. Turn you tripod so another pair of hooks is facing you. Repeat the process for this pair and the next pair. Securing all six hooks to all six wires ensures the stability of the tree, prevents any wobbly legs and allows for some pretty rough handling.
Step 5
Pick up the string of lights. Place the first bulb up from the plug at the top of the wire frame (where the star would go on a real tree), 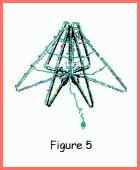 letting the cord dangle down along the middle of the frame. Secure the bulb in place with a twist tie/string. Then secure the dangling string to the base of the middle (near the hooks) so the plug will always issue out from the center bottom of the tree. String the lights around each hanger and/or wrap in circular fashion, whichever works best for you. Secure here and there as needed with twist ties/string to keep the light string in place. See Figure 5.
Step 6
Pick up a garland and dangle about 3-5 inches of it down the center of the tree frame. Secure it at the very top with a twist tie/string. Secure the dangling end if you like things tidy. Wrap the tree by going round and round until you’ve reached the bottom. See Figure 6. Keep the garland wrapped tightly so you get no gaps and it will stay nice and full. (Don’t 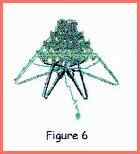 worry about the lights not showing through just yet – we’ll come back to that.) If you run out of garland before you get to the bottom, secure the end to the nearest wire and pick up the next one. Secure its end in the same location where you left off with the last one and then continue wrapping. Repeat this until you have the entire frame wrapped down to the tips of the hangers. Secure here and there with twist ties/string as you see fit. If you have excess garland secure it to the frame where you judge it should end, and – for now – let the excess dangle free. Now tip the tree over on its side and poke any lightbulbs you see through the garlands to the outside. When you’ve done that, stuff the excess garland up the middle and secure it with twist ties/string so it doesn’t fall out.
Step 7
Place your tree upright and decorate it. Plug it in and enjoy it!NOTE: The lights do get warm, but not hot enough to be a hazard. I have used these trees several years in a row and have left them plugged in 8-10 hours at a time. Just follow normal safety and unplug the tree when nobody’s there!
by Sunni Bergeron

