Ombre Nails DIY Tutorial with Sponge
Ombre – the beautiful technique of shading, gradation or softly mixing two colors is not just the hottest trend in apparel. It has taken over every aspect of a fashionista’s life, including her nails. Make your next nail art an ombre affair with this easy step by step tutorial using a sponge.
Supplies Needed:
- Base color – we have used mint
- Second Color – ours is dark purple
- Clear/Transparent nail paint or top coat
- Cosmetic Sponge
- Vaseline – to make your life easy!
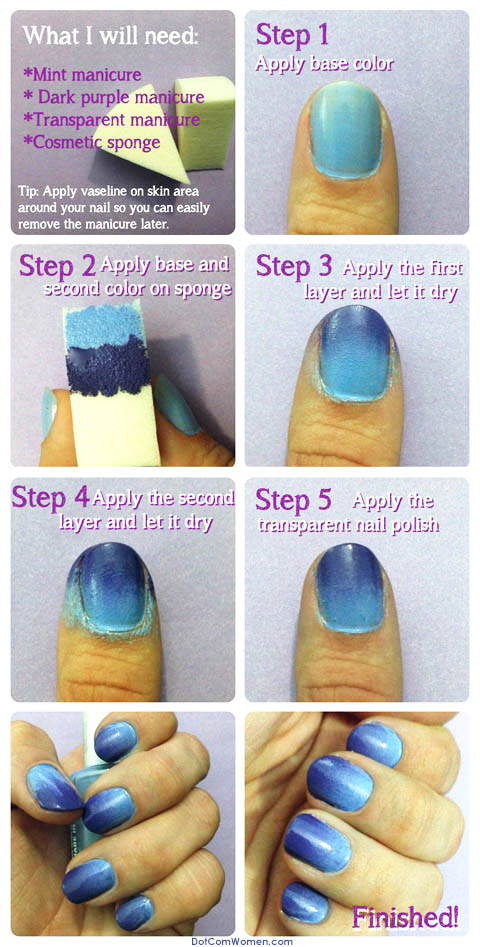
Using the pictures of steps as a guide, here’s how you can get the ombre look:
1. Apply the base color on your nails and let dry.
2. Then, apply the base and second color on the sponge as shown, overlapping the two shades where they meet.
3. Press the sponge on your nail (with the base coat applied). Let dry.
4. Apply a second coat and a third, if necessary, always allowing drying time in between.
5. Apply transparent nail polish to even out your manicure. You might need more than one coat for an even finish.
And you are done! You can create as many color combinations as you wish, to complement your outfits.