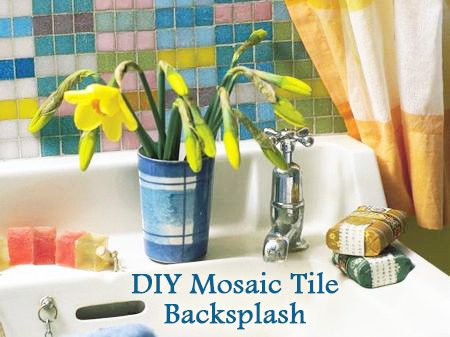
DIY Mosaic Tile Backsplash for Your Bathroom
Banish bathroom blues with this colorful diy mosaic tile backsplash. This vibrantly colored idea is solely inspired by the amazing selection of glass tesserae tiles available. The translucent quality of the pigment in the glass means that the shades have a particular intensity, and as with all design using colour, the choice of juxtapositions is vital to the final effect.
This easy project involves no cutting as the pattern is created with the use of changing tones. The only skill involved is trying to ensure that the spaces between the tesserae are as even as possible. This approach can be extended to cover a whole bathroom wall, but if you feel a little less adventurous, try decorating a simple tabletop.
Why not decorate your entire bathroom taking a color from the tesserae pattern as your inspiration. Extend this theme matching to choice of towels and even your toothbrushes!
You will need
Piece of plywood or MDF 4mm (¼”) thick, cut to fit above the basin
Waterproof PVA and adhesive
Selection of coloured glass tesserae in the tones used here or your choice of colors
Grey grout
Palette knife
Sponge
Soft polishing cloth
How to:
Put small dots of glue directly onto the background material and start to build up a column of turquoise tesserae three tiles wide. It is most important to make sure that the pieces are evenly spaced with about 2mm (1/16″) between each.
After the first two rows, add a line of pale blue followed by bands of turquoise, pink, turquoise, acid yellow and complete the column with two rows of turquoise.
Stick a second line of green tiles in place interspersed with a deeper turquoise, blue-green and a strong orange. Start the third column using pale blue banded first with pale pink, then with strong orange and finally grey-green.
Continue working in this way adding three-tile-wide columns in subtle tones and contrasts. Allow the glue to dry and grout and polish. To fix the backsplash to the wall, use cement adhesive and grout to finish around the edges.
Padding Out
Grouting means filling in the gaps between the mosaic pieces to give a smooth surface to the finished design. It also protects the mosaic from water and dirt. Exterior designs may be grouted with cement or cement-based powdered grout, which is available in black, grey and white. The latter is suitable for interior work as well. White grout can be colored by adding a small quantity of water-based or acrylic paint. Dark grout brings out the intensity of color of the mosaic pieces while grout of a similar tone has the effect of unifying the design. The ready-mixed variety is useful in some cases and the combination tile adhesive/grout is necessary for projects such as those using shells as their uneven surfaces make it impossible to finish in the normal manner. Quickly sponge off excess grout and polish the dry piece with a cloth to remove any remaining traces.
How to – Smooth Set
There are a number of ways to apply grout, depending on the size and surface of your mosaic. For a large flat area a squeegee is ideal. Pull it across the surface, pushing the grout firmly down into the gaps. A palette or kitchen knife can be used on smaller items. The process can also be completed with fingers on uneven or curved designs.
After the grout begins to set (see packet for drying times), rub excess from the surface with a damp sponge or stiff nail brush. When dry, polish off any remaining film with a dry, lint-free cloth. Remove any residue of grout or cement adhesive with brick or patio cleaner. This is a diluted hydrochloric acid and packet instructions must be followed to the letter.
Safety First
Always wear a face mask and protective goggles when cutting any kind of ceramic or glass pieces as fine dust and tiny glass shards result from the cutting and can be extremely hazardous.
To avoid the danger of tiny glass fragments, tesserae can be held and cut under water in a bowl or bucket.
Always keep your work space clean and wear a face mask even when sweeping the floor where you have been working to avoid breathing in the dust.
Designed by Deborah Schneebelli-Morrell’s