
Teabag Folding Butterfly Instructions
Recommended Books:
|
Key:
Red lines = valley folds Blue lines = mountain folds dotted lines = creases from prior folds
White is the plain side of the paper Yellow is the printed side of the paper
|
|
|
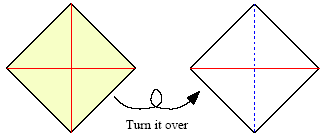
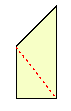
| Step 1 With the printed side up, fold the paper in half diagonally in both directions. | Step 2 Fold in half diagonally |
|
|
|
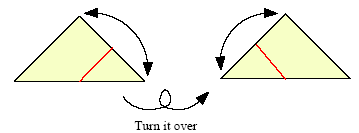
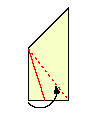
| Step 3 Fold the lower right corner up to the top corner. Crease and unfold. | Step 4 Fold the lower left corner up to the top corner. Crease and unfold. This is the same corner you just folded in step 3. |
 |
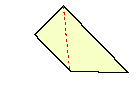 |
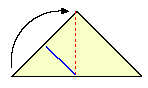
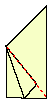
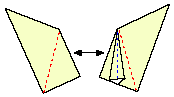
| Step 5 Fold the lower left corner up and to the inside of the tile. | Step 6 You have completed the left wing. Repeat steps 1 – 5 for the right wing. |
 |
 |
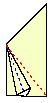
| Step 7 Turn your second wing wing over and rotate it so it looks like the diagram above. | Step 8 Fold the top layer of the lower left corner up to the fold line as indicated by the arrow. |
It should look like this.
 |
 |
| Step 9 To form the butterfly body, open the fold you just created (using a cocktail stick) and flatten it out as shown. | Step 10 Slide the top layer of the left wing under the butterfly body on the right wing so that the bottom layer of the right wing is sandwiched between the top and bottom layers of the left wing. |
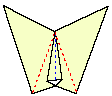
The completed butterfly should look like this. You can fold the wings up slightly on the red dotted lines to give it a 3D effect.