
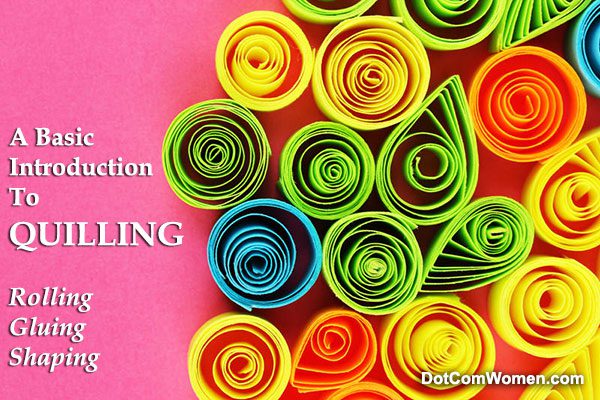
A Basic Introduction To Quilling – Rolling, Gluing, Shaping
Quilling is an ancient art form, believed to have been originally developed by nuns and monks in the Middle Ages, rolling off-cuts of paper from illuminated manuscripts around duck quills to form scroll shapes, hence the name ‘quilling’. These were then shaped and sometimes gilded, and used to decorate religious items, with much the same effect as filigree metalwork.
Nowadays quilling has developed to incorporate many individual styles, from the traditional to the modern, and quillers often use other types of materials in their work.
To Begin You will need:
• Strips of paper of varying widths. The standard width in the UK is 3mm (in inches: one eighth) for most items, 1.5mm for fine narrow work, and 6mm, 9mm, or even 12mm for folded roses and fringed flowers.
You can buy quilling strips from hobby and craft shops, but to start off with you only really need ‘scrappy’ stuff to practice with, so I’d recommend using scrap paper put through a shredder: they tend to give 3mm wide strips. The edges can be a bit ‘fuzzy’ with un-detached paper scraps, but they’re good enough to practice rolling the strips at first.
• PVA glue. It’s easiest to use if it comes in a bottle with a nozzle, but if you can’t get one like that you can pour some out into a container for use.
• Tweezers. Although eyebrow tweezers will do if you can’t find anything else it’s best if you get ones that come to a narrow point, as fine as possible, without any ridged surface that could crumple the paper. A good craft shop should stock something like this.
• Sharp scissors: they’re handy for trimming ends of strips, fringing flowers etc.
• A flat surface to work on, preferably plastic or something similar.
Optional tools:
• A quilling tool. It can make learning how to roll the paper easier when you start, which is good, although it also makes large spaces in the centre of your roll, which can make it look less delicate.
• A cocktail stick. Use this to transfer glue from the pool poured out to the end of your strip that needs gluing.
Getting started
All quilling pictures are made from a few basic shapes, all very simple to make one you’ve got the hang of rolling the paper, so we’ll start with that…
Rolling
 To do without a tool: select a strip of paper, any length, but preferably 3mm to start off with as its slightly easier to control than 1.5mm or 6mm. I scrape the end of the paper with my nail to start it curling a little bit, then squish the end into the tiniest fold I can, and try to begin a roll between thumb and index finger. Run the pad of your thumb up the side of your index finger with the paper between them, and this should make the paper curl up as it moves to the top. When you roll it to the middle knuckle of your index finger, grab it with the tweezers around the outside edge of the roll. This will keep it secure until you can put it back between your thumb and forefinger and keep on rolling it up again. Roll until you come to the end of the strip.
To do with a tool: put the end of your strip into the slot on the tool (apparently dampening the end can make it more likely to stay in the slot) and roll!
Theres no rule that says you have to try and do the roll exactly as I (try) to describe it above: if you find a simple way to roll the strip, then thats the way to do it for you! Everyone discovers a technique that works best for him or her, so experiment with different ways of starting off the roll
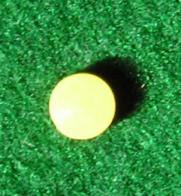
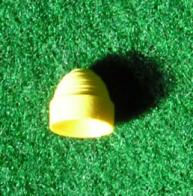
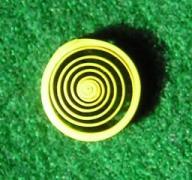
Once youve figured out how to start the roll off, youll find you have a tightly rolled circle of paper (unless it slipped and uncoiled when you were rolling, which means youll have an open circle) This is a tight roll (also called a grape roll), and it can be glued at this point and used as the basis for 3D designs. If you let go of this tight roll (or it slipped as you wound it), itll unwind itself and gradually relax into its uncoiled size. If you glue this, its a loose roll. So, now onto gluing
Gluing
 Holding the loose roll in your hand, wipe the end of the strip against the glue nozzle or dip the cocktail stick into your pool of glue, and dab the glue onto the ripped end of the strip. If you feel the circle has unrolled too much pull the loose end of the strip to tighten it up, and press the glued side of the strip against the body of the roll, using the tweezers to get in between the coils and press the end down tightly without kinking the circle. This should give you a circular shape, with the unrolled coils looping in the centre into a curl.
To glue the tight roll, just dont let go of it to let it unroll, and glue the end against the tightly rolled body. From the basic circle in its loose and tight forms we make all the other shapes.
Shaping
Loose Rolls
Circle: Easy to make, its just the basic strip rolled up and glued!
Teardrop: Support the central coil with a fingertip, and find the point where the strip is glued to the body of the roll. When you find it, take your thumb and index finger of the hand not supporting the coil, and pinch the sides, making the glued edge the point of the pinch. This will kink the loops of the coil and create a teardrop shape. Its not essential to make the glued bit the tip of the point, but it can help to keep the sides looking smoother as the tiny bump of the glue wont show as much.
Diamond/Eye: From the teardrop shape, pinch the end opposite the tip, making a shape with two pointed ends.

Square: From a diamond, pinch two points in the smooth sides, in the same way as making the diamond shape originally. This should give a shape with the four points roughly equal in distance from each other
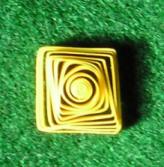
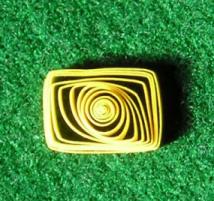
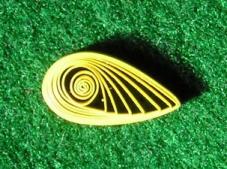
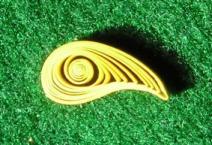
These are some of the main shapes. Youll find that youll start needing other shapes eventually, but they can be easily adapted from these basics. A few other basic shapes are illustrated here.
Making A Picture Most things can be made through quilling, you just need to be able to visualise the shapes that things are made up out of, e.g. circles, teardrops, squares etc. A simple piece to make using these shapes is a duckling.
Click Here for Quilled Duckling Instructions
So, there you go, a quick run-through of the basics of quilling. I hope you decide to have a go, its very easy to pick up, and theres so many ways to develop and experiment with those simple little strips of paper!
by Quilling Expert Jennifer Findlay